
After years of planning and months of redesigning, it’s finally done: our new homeschool room/design studio/home office, or what we call “The Studio,” is ready to accept students! (Ok just kidding, I’m only accepting one student for now and that’s Luke!)
Allow me to take you on a virtual tour as I share with you the concept of the room, the different inspirations behind it and some tips in case you’re planning to create a similar space. Hope you like it!
UPDATE: JAN 1, 2018
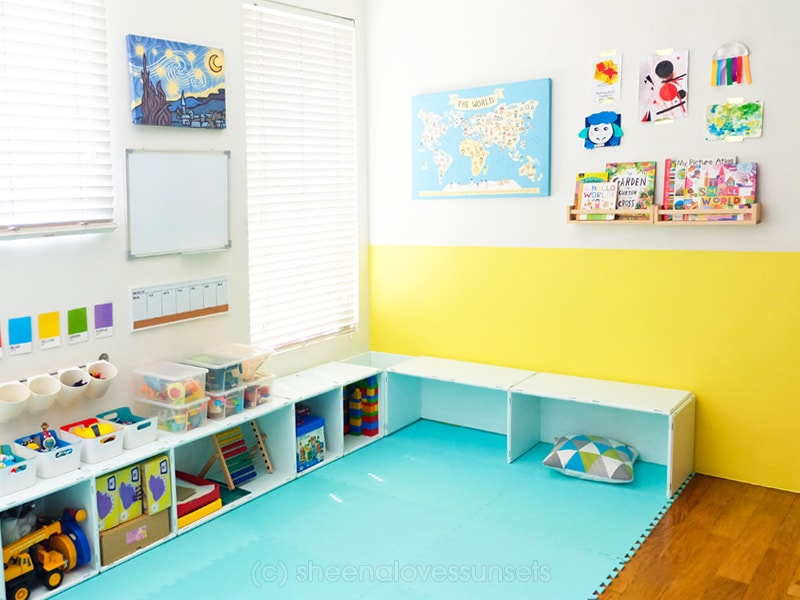
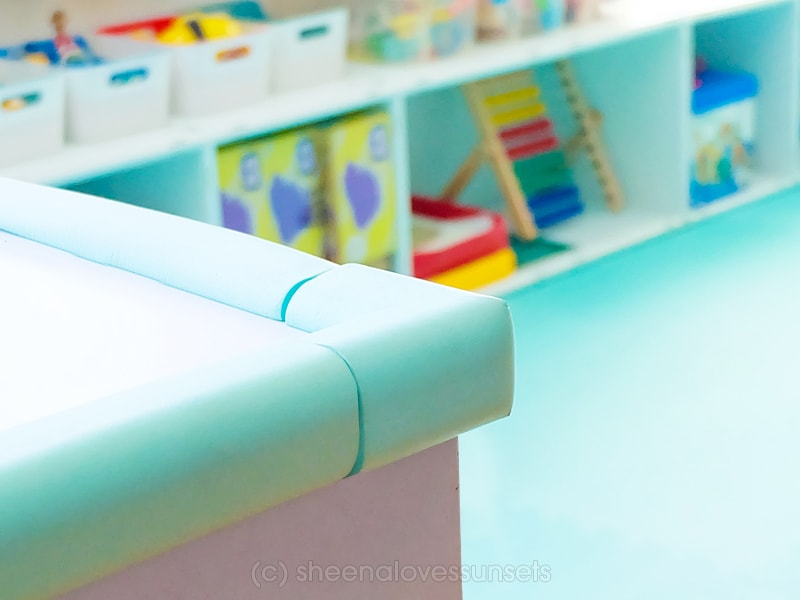
I’ve completely changed the floor mats that I used for Luke’s playroom and because I absolutely love these new mats, I thought that it deserved an update on this post! So here are photos of how the room looks like now:
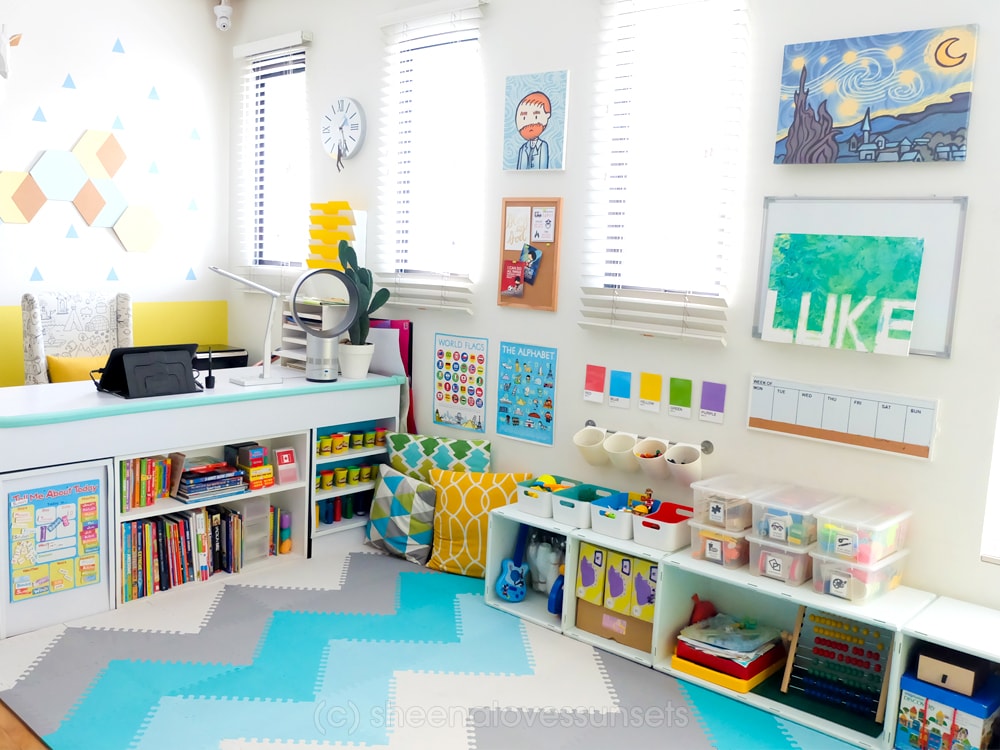
These playmats are from Bonjour Baby and I used up 3 full sets for the space, but it’s sooo worth it. I love that the mats have “edges” so the floor looks clean!
You can also change up the pattern if you like! You can make at least 15 different patterns. So fun, right? Check them out at IG and FB @bonjourbabyworld!
Here’s the rest of my original post; photos from before I got my new mats. Haha 🙂
—-
Combining An Office + Homeschool Room
If I had 10 lifetimes, I would be a preschool teacher in one of them. But because I only have one, I chose to be an illustrator, designer and travel writer instead.
When I became a mom, I noticed that I was just naturally teaching my son every day and I loved it. What’s more, my current set-up as a stay-at-home-working-mom actually allows me to work and teach at the same time. I’m not yet 100% sure, but I’m really leaning towards homeschooling Luke at least for his first few years (more on that next time!) This is why creating a space where I can integrate all those different roles and tasks was very important to me.
Now without further ado…
Welcome to “The Studio”
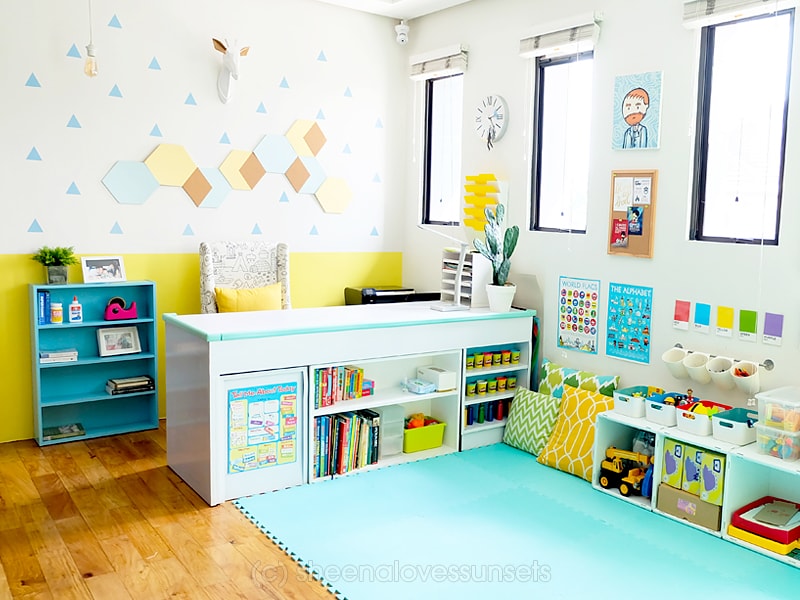
The studio was created as a space where Luke (and our future kids, by God’s grace) can play and learn. At the same time, it was also to function as a home office and a design studio where I can illustrate, work on my designs and even have product photoshoots while keeping an eye on them.
THE THEME & COLORS:
I chose yellow and aqua because the combination screams “happy sunny day!” I love that it makes the room feel cheerful and lively. Besides, my artworks are always super perky and colorful anyway so it was really the perfect match. Haha.
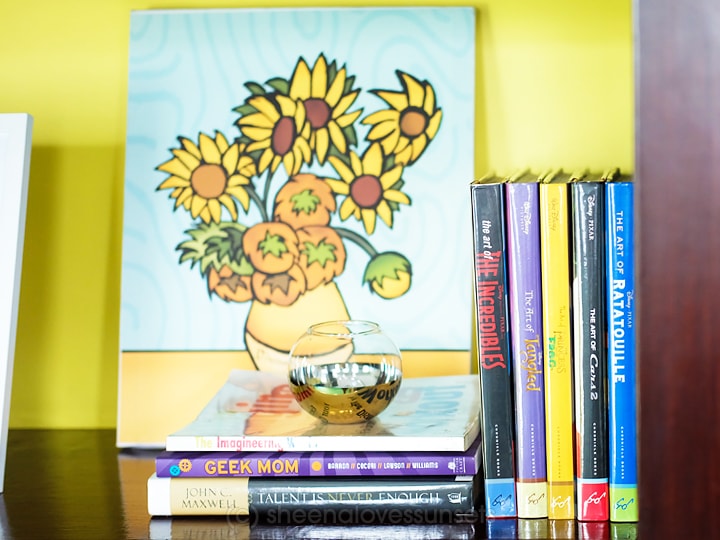
Though it’s just expressed subtly, the studio’s theme is “art” because it’s a place where my kids and I will be creating art! If you notice, there are little art references all around the room, like the giant pencil, which is really a bag (Thanks, Benefit PH!) and the Andy Warhol and Van Gogh paintings, which I recreated in my own style.
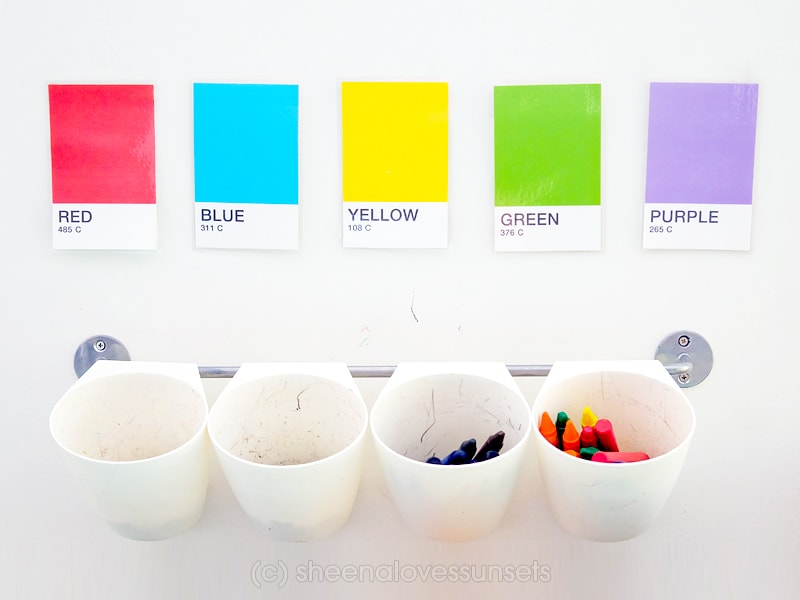
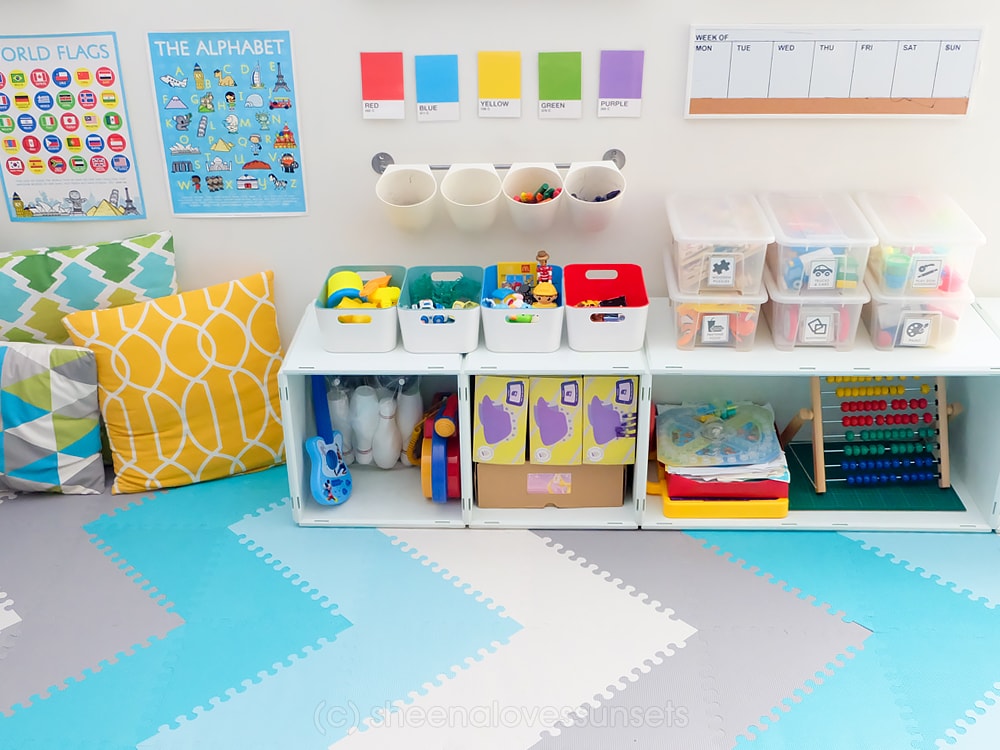
And in case you didn’t notice, the color flashcards on the walls are in Pantone style. #DesignerLife
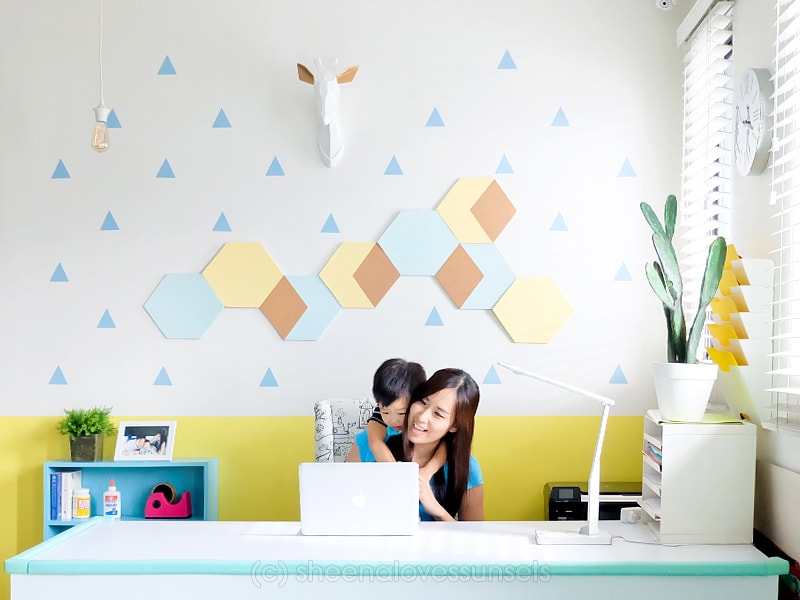
The Home Office/Design Studio Section
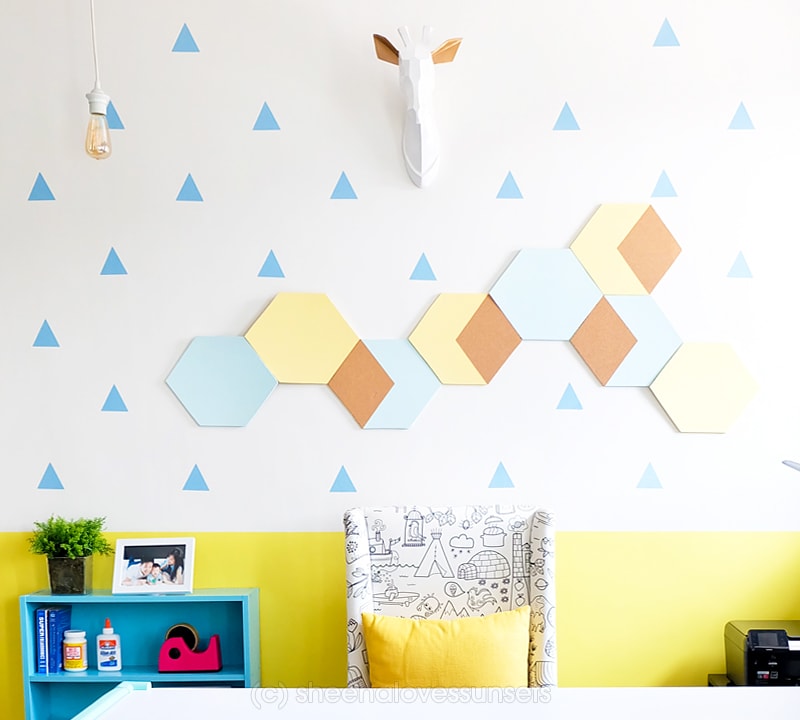
This is my side of the room: the home office. I wanted my table to face out instead of facing the wall so that I can supervise my students (hehe) even as I work.
Here are the details of some of the pieces:
- Deer Head: From a thrift sale. We repainted it to white and gold.
- Hexagon Cork Boards: From Organize Me PH. Currently serving as a wall art because they’re so pretty and I haven’t posted anything yet. Haha.
- Triangle Wall Decals: From White Walls PH.
- Chair: Custom-made using fabric from Ikea.
The only thing this area is currently missing is an iMac (SOON!) Basically, as a design studio, I also use this space to take product photo shoots for my designs and blogger duties. Luke’s play area doubles up as an awesome flatlay station (with amazing natural lighting too, if I might add!)
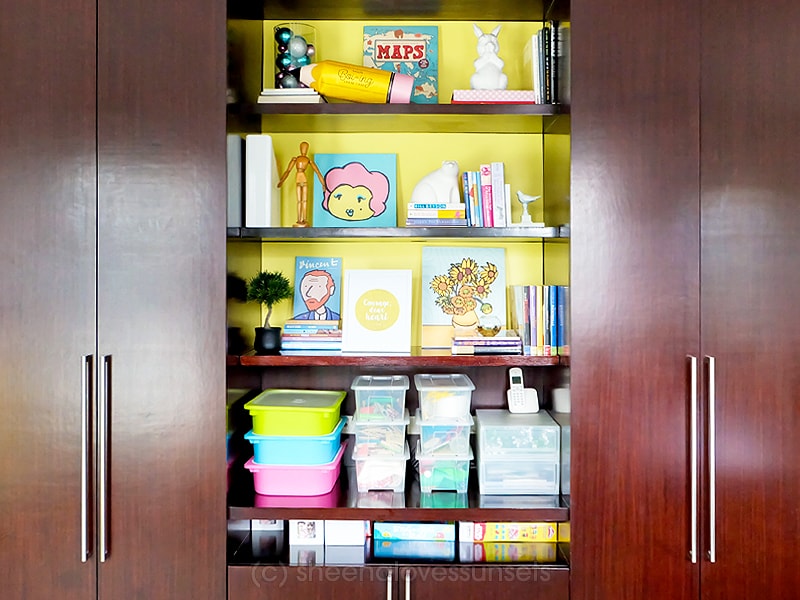
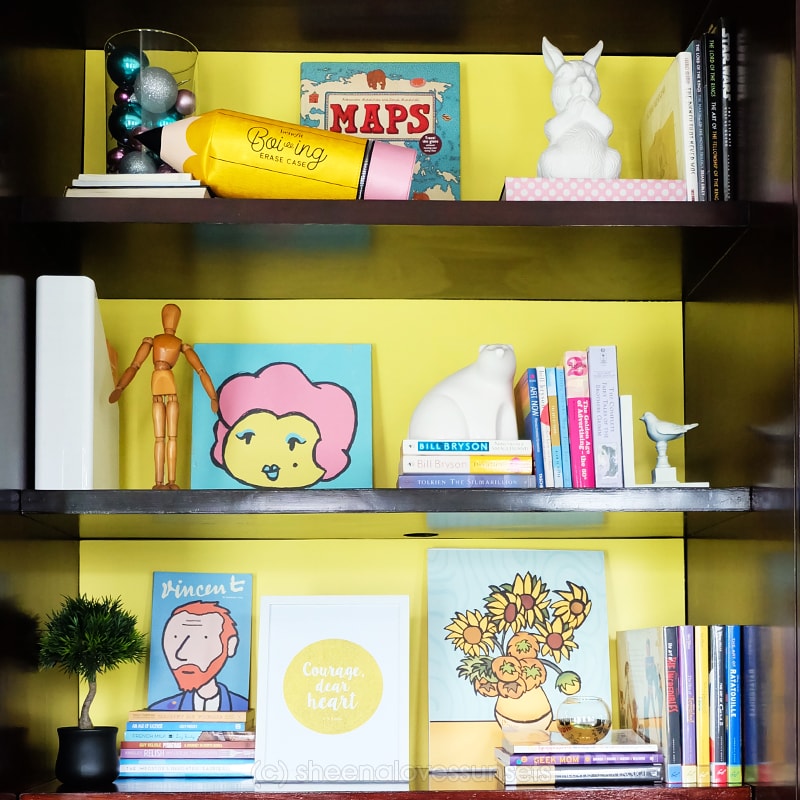
This is the storage cabinet where I keep all my props for photo shoots, books, merchandise and other stocks. It was already built in when we got our home and I had no control over the design and measurements. If it were me, I’d have chosen a lighter shade. In fact, I really want to change the doors into mirrors to make the room feel bigger, but I really don’t have the budget right now.
In the meantime, what I did was just to make sure the display shelves were bright to match the room. I had plyboards painted in yellow and used them as the backgrounds of the display shelves.
Trivia: One of my dreams, when I was in high school, was to become a Disney animator. Notice my Disney “Art of” book collection? I’m eyeing a few more actually!
The Homeschool Section
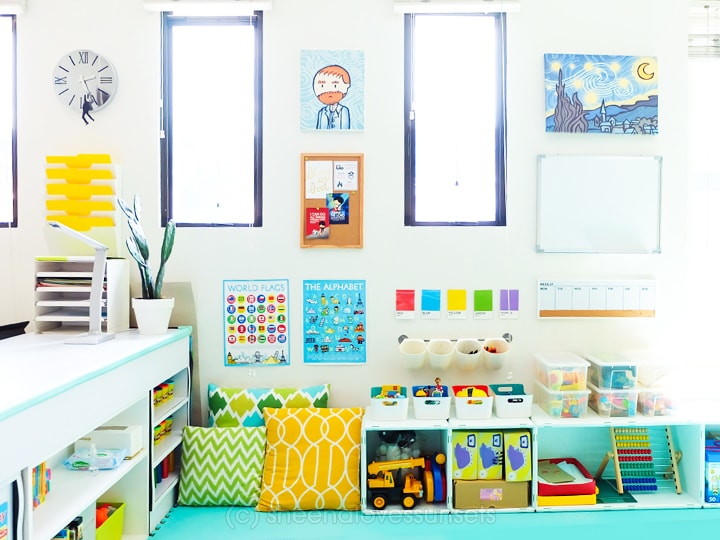
As of now, Luke is only 2 years old so the entire place was designed like a preschool. I tried to make everything accessible to him so that he can grab his toys and books independently.
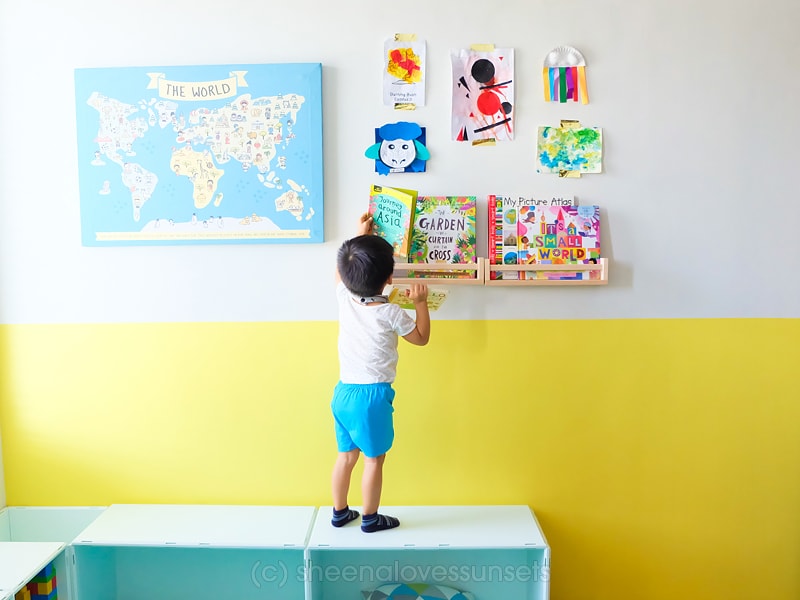
Err… except for these bookshelves! But he seems to have found a way anyway! Oh, Luke…
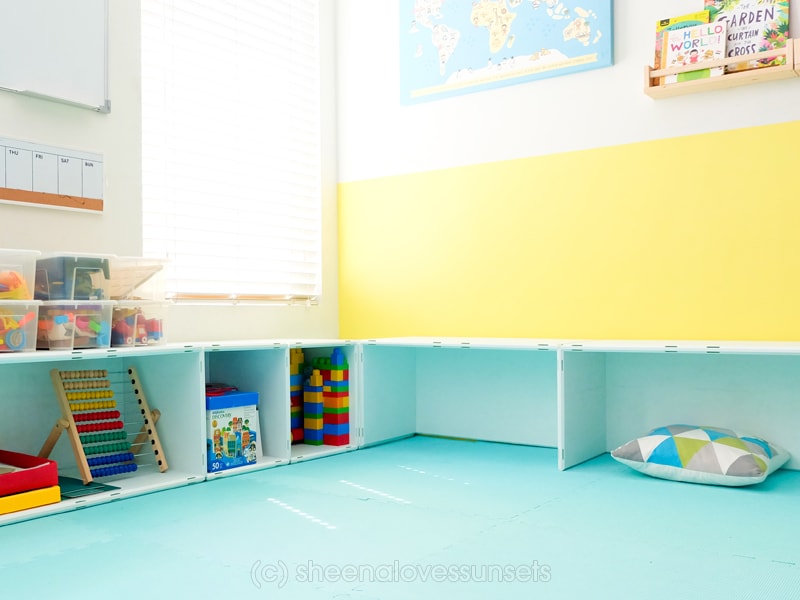
One of my favorite pieces in this room is this set of open shelves. I got them from Simply Modular and they are just THE BEST. For one, they were so easy to assemble. You get them as planks and they fit like puzzle pieces!
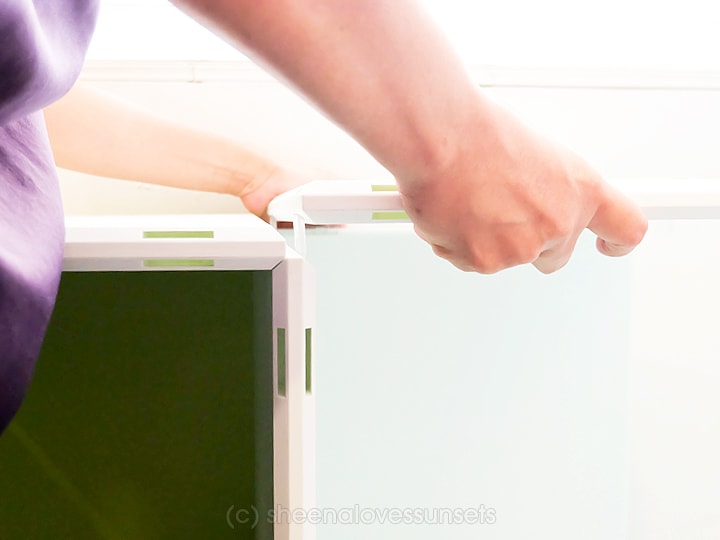
And because they’re modular, you can mix and match them according to your preference. In fact, I can rebuild them over time as the needs of my kids change. Like if I want to make the table higher or if I want to stack the shelves.
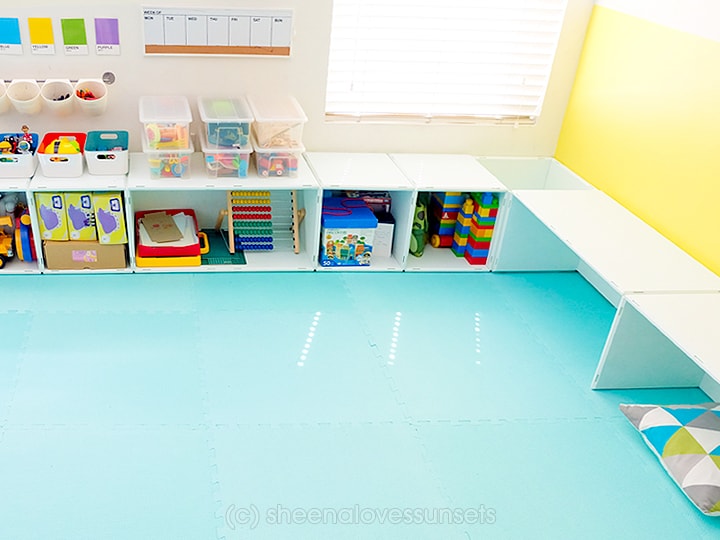
For now, though, I decided that I wanted open shelves in just one level so that, as mentioned, Luke can easily see and reach for his toys.
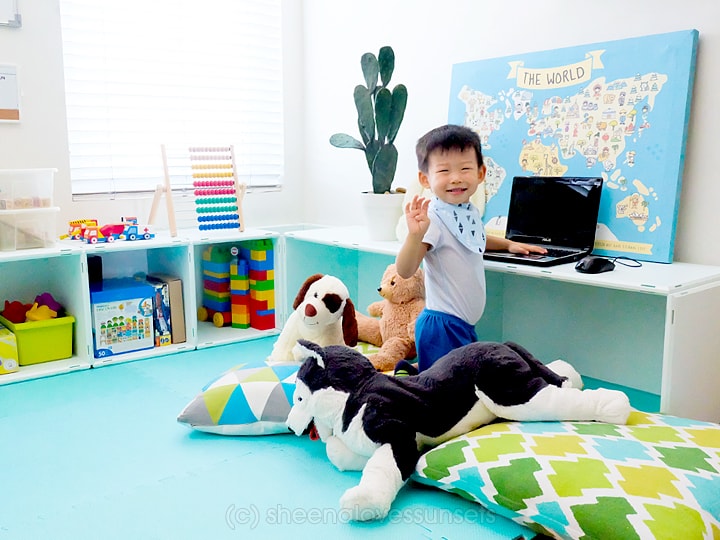
I also made him two mini tables (yes, amazingly enough, from the Simply Modular planks too!) so that he can work together with friends when they come over. I didn’t put chairs because I tried giving him small chairs before and he would just keep on moving in and out. So I decided to put pillows on the floor instead.
(Note: That photo was taken before the final renovation was completed. Hence, the white walls and the out-of-place cactus display on the table)
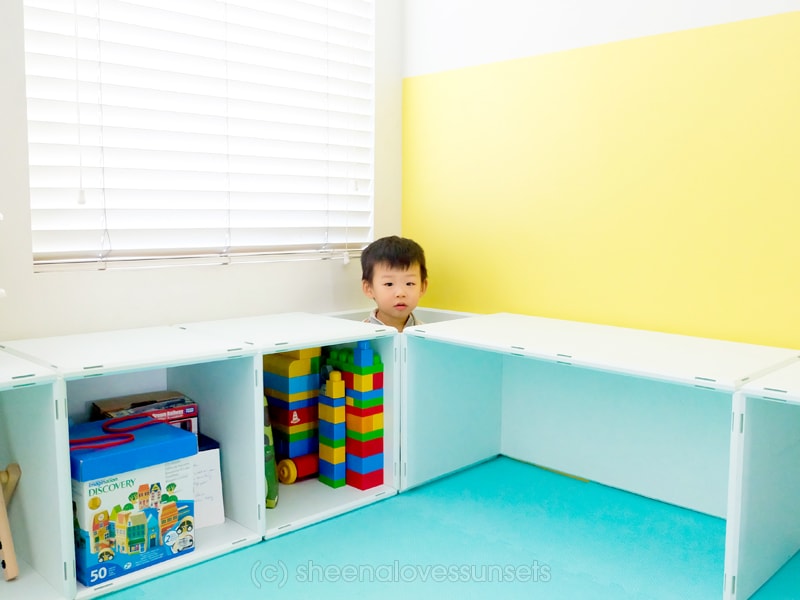
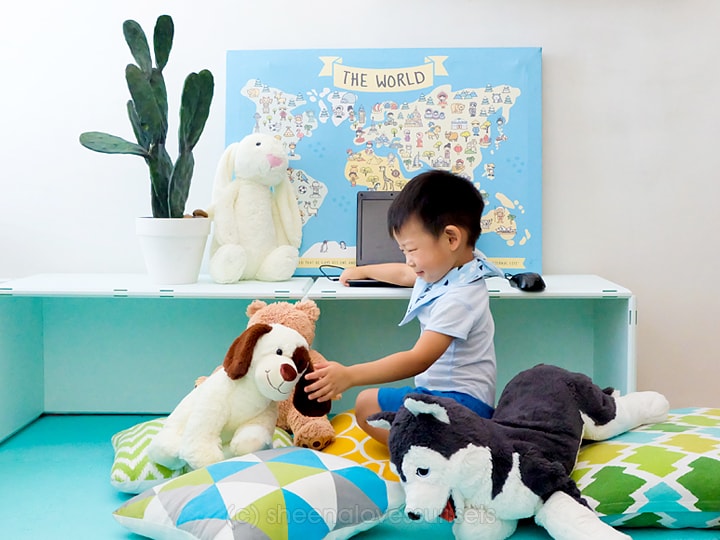
I thought long and hard about what to do with the corner but God gave me the wisdom to turn it into an open box! It was supposed to be for some of his stuffed toys but he loves using it as his not-so-secret hideaway. Haha!
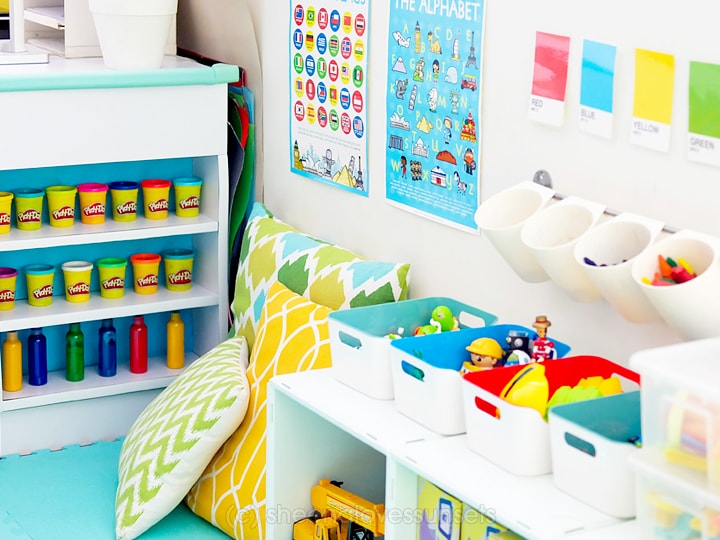
This is his little reading nook with comfy pillows and his “Play-Doh & Paints Station.” It’s actually part of my desk. It wasn’t planned that way (it was just supposed to be display shelves) but then we discovered that it fit his Play-Doh’s perfectly so, Play-Doh storage it is!
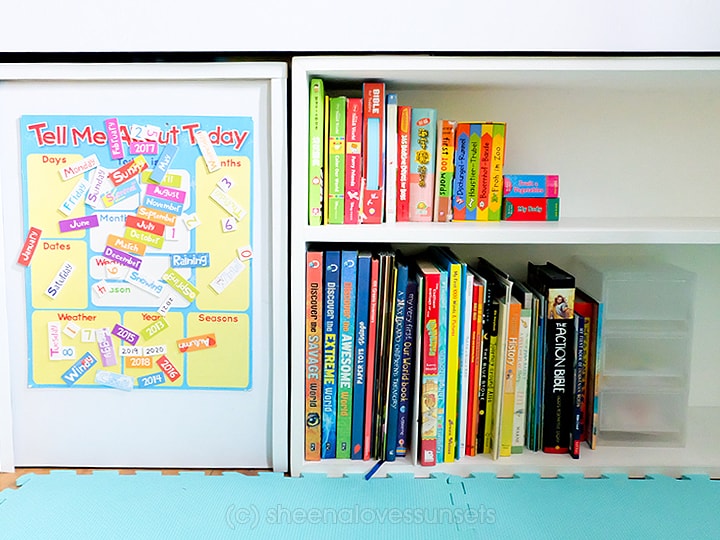
Also part of my table (on the other side) is this bookshelf. There was a dead space where my drawers were located so I stuck a magnetic “Tell Me About Today” poster instead.
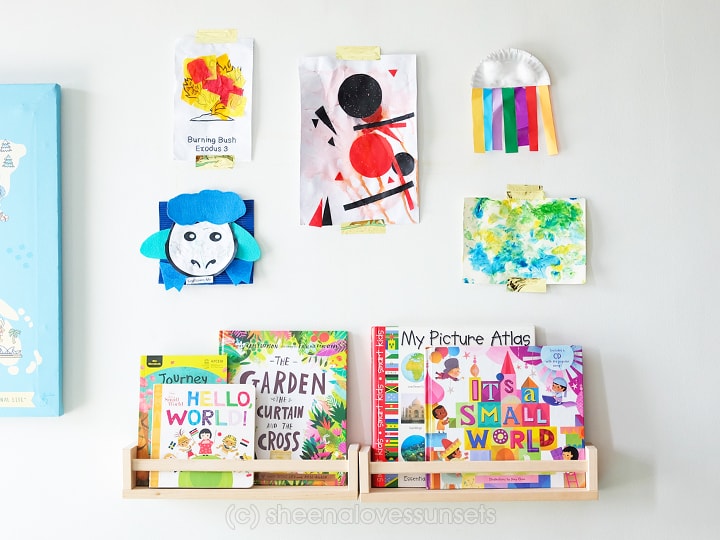
And this is where I display Luke’s artworks. He made most of these in Sunday School at church and I treasure them all! The bookshelf is a spice rack from Ikea that we repurposed. #IkeaHacks
Tips for Creating an Integrated Space
It’s nice to have a big space for an integrated room like this but, to be honest, you can work with whatever space you have. Just maximize every inch of space. Here are other tips you might want to consider:
- Make sure all sharp corners and edges are protected with bumper guards. I get mine from Bonjour Baby because they have colors that match the room!
- Be mindful of your supplies. I use a giant cutting board and other sharp supplies for work but I put them away in a place where it’s out of Luke’s reach to keep him safe.
- Stick to your theme and/or color scheme: It’s a design principle I always follow when it comes to spaces; always stick to just 2-3 colors for your main pieces and accents. This makes the room look more coherent and well-coordinated.
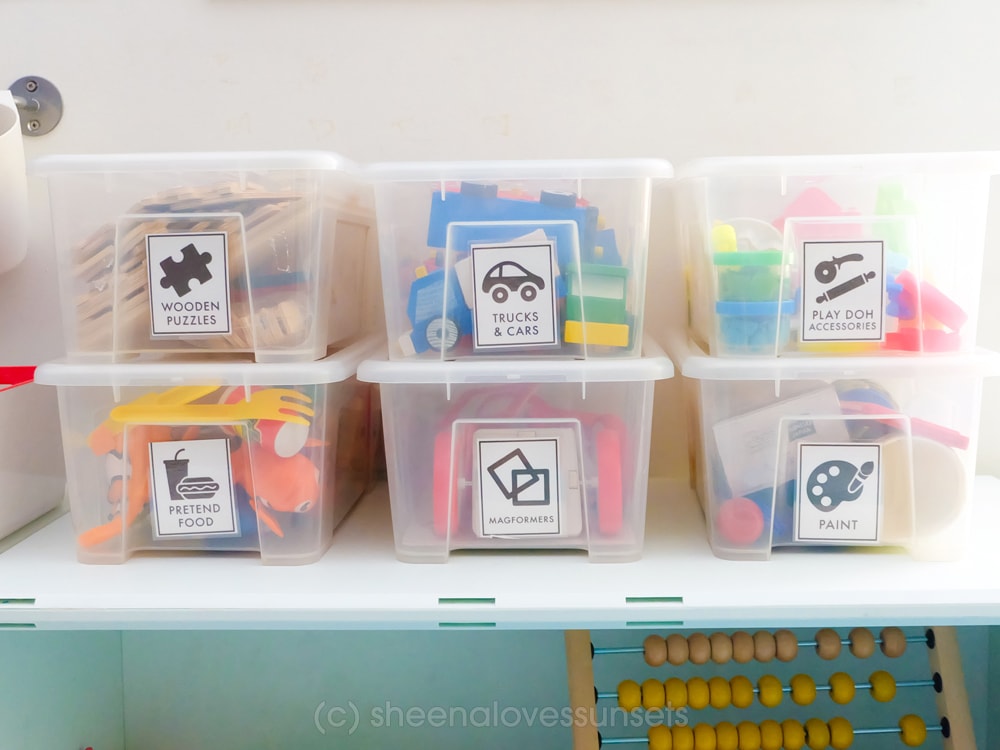 Lastly, LABEL YOUR BOXES! I recently got a laminator (thanks Angeli!) and I was able to print out labels for our boxes! YAAY! Hehe. Definitely makes it easier! I love my laminator and I might go on labelling the whole house, at the rate I’m going. Haha.
Thanks for taking on this virtual tour of our Studio. What do you think? Which part did you like most? Do you have a similar space? I would love to see what you have! Share them in the comments below!
—-

24 Comments
Kisty Mea
July 10, 2017 at 8:52 pmWow! The room is so nice. Great choice for the colors and the pieces. I like that octagon cork board. I think it’s an interesting yet functional wall art.
Sheena Sy Gonzales
July 10, 2017 at 9:04 pmThanks Kisty! I fell in love with the cork boards the moment I laid eyes on them. Haha. <3
the adventurer
July 11, 2017 at 2:27 amBeautiful! i love all of the colors =o) It really makes for a great homeschool room =o)
Sheena Sy Gonzales
July 11, 2017 at 10:31 amThank you! I really hope so!!
Gabrielle
July 11, 2017 at 6:23 amOh wow, it looks so perfectly bright, colourful and fresh! This is such a great space and a very cheerful one at that 🙂
Benita James
July 11, 2017 at 7:07 amWow. it looks so beautiful and inviting.
Angeli
July 11, 2017 at 10:18 amLove everything about this room! Especially the little boy! 🙂
Sheena Sy Gonzales
July 11, 2017 at 10:37 amHaha thanks Angeli! The little boy loves you too! <3
Ken Patricio
July 11, 2017 at 12:52 pmI love the presence of cactus in the room! How I wish I also have this kind of working area. Pleasant to the eyes and well organize. Affirm Ms. Sheena!
Sheena Sy Gonzales
July 11, 2017 at 12:59 pmThanks so much Ken! I love the cactus too! Hehe!
Yssa
July 11, 2017 at 4:35 pmI was homeschooled from 4th grade up until I finished high school. Currently a scholar at Miriam College. Homeschooling is great but it would depend on the student. Some kids prefer to be around other kids. We, my siblings and I, regularly attend a youth fellowship so we’re “used to people.”
Sheena Sy Gonzales
July 12, 2017 at 8:03 amHi Yssa, thanks for sharing your experience! I plan to homeschool during his preschool and early years but would like to transition him to regular school as he gets older. I also wanna see how he likes it and if we can keep meeting with our playgroup and church friends regularly too! Thanks again!
Chie
July 13, 2017 at 6:58 amLove those open shelves! I’ll be looking for it in Wayfair.
Christina
July 14, 2017 at 11:22 pmOh my gosh, this room is SO CUTE. I absolutely love the color combinations and room decor! Amazing job. 🙂
Sheena Sy Gonzales
July 15, 2017 at 11:44 pmThanks Christina! Appreciate it!
Louise Ramos
July 24, 2017 at 7:01 pmOmg, the room is so cute! (And functional yas!) I love both yellow and teal so heart-eyes everywhere. I get so giddy when I see rooms like this with so many containers and organizing shelves and boxes. The OC inside me is so happy!
Sheena Sy Gonzales
July 25, 2017 at 9:01 amHi Louise thank you so much!! <3
Kim
July 25, 2017 at 12:30 amWHOA are you serious?! Is this seriously your new homeschool room?! This place looks amazing! Luke and your future kids would be so very lucky to be able to learn and play in this room. I love how you’ve styled everything. I am VERY impressed!!
Kim
Simply Lovebirds
Sheena Sy Gonzales
July 25, 2017 at 9:00 amHi Kim thanks so much! Yes it’s our studio hehe, it looks bigger on the photos though hehe. 🙂 Thanks!!
Nik Sevilla
August 21, 2018 at 9:39 pmHi! What kind of laminator did you use? Thank you! 🙂
Sheena Sy Gonzales
August 22, 2018 at 8:44 amIt’s a brandless laminator gotten as a gift from my friend! 🙂
MM Somodio
April 3, 2019 at 7:29 pmHi! For the Simply Modular shelves, no need to put bumper guards? I have a two year old and currently scouting for a shelf to put in his playroom.
Sheena Sy Gonzales
April 6, 2019 at 9:17 pmHmm.. I would still put corner guards. The corners aren’t sharp but they’re still hard!
Clarasophic
December 8, 2019 at 6:25 amVery nice studio! ? Love everything on it! Will try some of the ideas you shared here because I will be homeschooling my son already. ?